Having network issues on Windows 10? Nothing’s more frustrating than a network adapter that just won’t work—no internet, no updates, no online games. Let’s break down what causes this annoying issue and how you can fix it—step by step.
Common Symptoms of a Faulty Network Adapter
How do you even know your network adapter is the problem? Watch for these signs:
No Internet Access: Your Wi-Fi or Ethernet is connected, but it says “No Internet.”
Network Adapter Missing from Device Manager: Open Device Manager and… it’s just gone. Like it never existed.
"No Network Detected" Message: You can’t even see Wi-Fi networks nearby. That’s a red flag.
Why Is My Network Adapter Not Working?
Understanding the “why” helps you pick the right fix.
Outdated or Corrupted Drivers: The most common issue. Drivers act like interpreters between Windows and your adapter. If they’re messed up, things go south fast.
Power Management Settings: Windows tries to save power by turning off devices—including your adapter. Annoying, right?
Recent Windows Updates: Sometimes, an update “breaks” compatibility with your adapter.
Hardware Failure: If you’ve tried everything else, the adapter itself may just be dead.
Method 1: Update Network Adapter Drivers
One of the most common causes of network adapter issues is outdated or corrupted drivers. These drivers act as the bridge between your operating system and the hardware. Updating the driver is often the quickest and most effective fix—whether you use Device Manager or a reliable third-party tool like Driver Talent X.
Use Device Manager
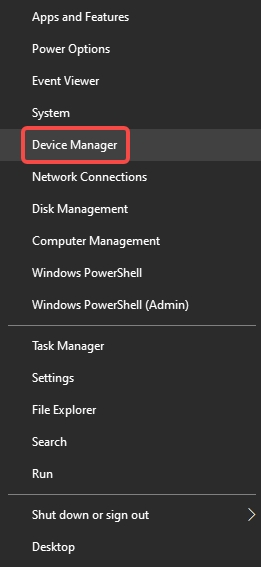
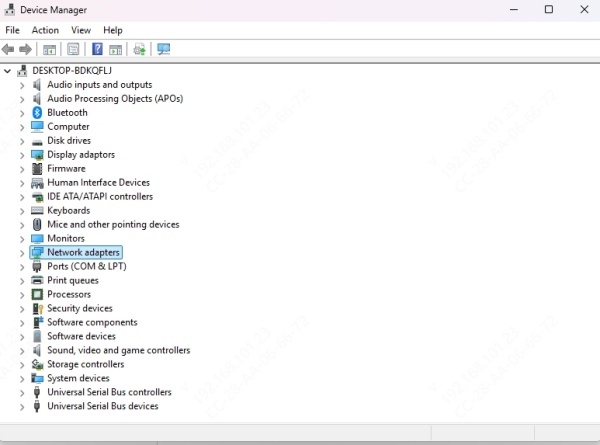
Open Device Manager.
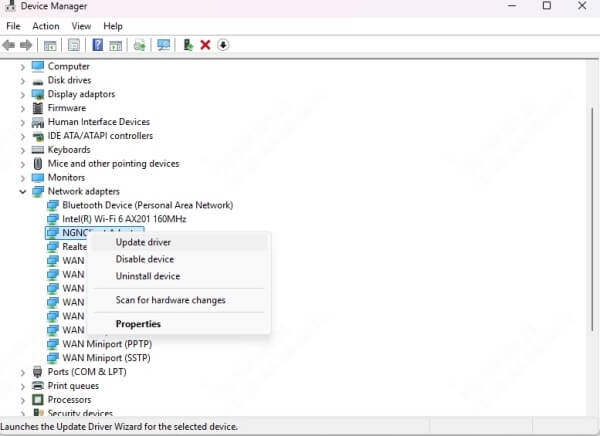
Expand Network Adapters.
Right-click your adapter > Update driver > Search automatically.
Use Driver Talent X to Automatically Update Drivers
Driver Talent X is a reliable tool that scans and updates outdated or corrupted drivers quickly.
Steps:
Download and install Driver Talent X.

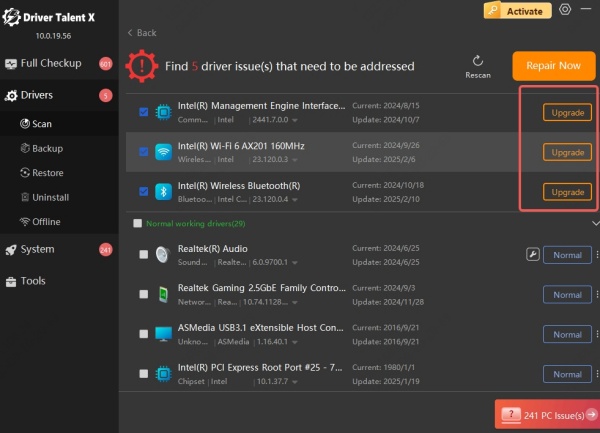
Launch the app and click Scan.
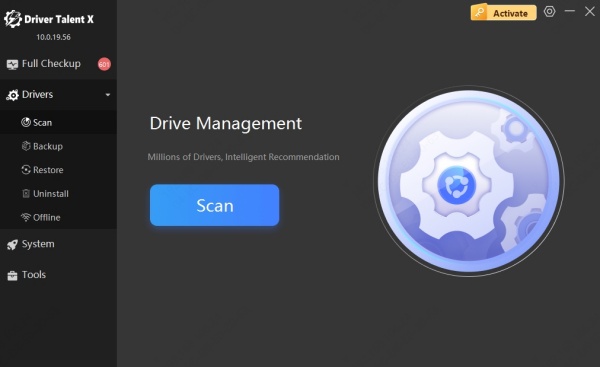
It will list all driver issues—click Upgrade next to your network adapter.
Restart your PC.
Method 2: Reset the Network Settings
If your internet connection is acting up and you’re not sure why, resetting your network settings can resolve hidden conflicts or misconfigurations. This method wipes out all saved network data—like Wi-Fi passwords, adapter settings, and proxy configurations—bringing your network components back to default.
Use Windows Settings
Go to Settings > Network & Internet > Status.
Scroll down and click Network Reset.
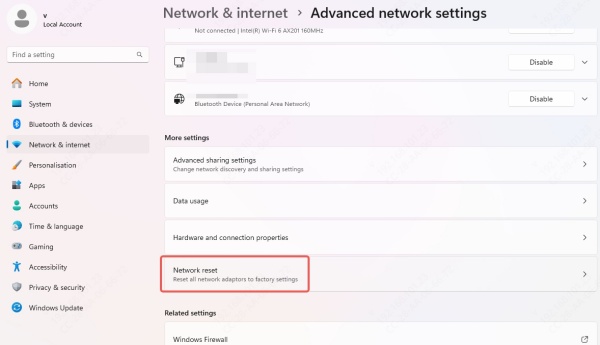
Click Reset Now.
Use Command Prompt
1. Open CMD as Admin and run:
netsh winsock reset
netsh int ip reset
ipconfig /release
ipconfig /renew
ipconfig /flushdns
2. Then restart your computer.
Method 3: Reinstall the Network Adapter
If updating the driver didn’t work, the next step is to uninstall and reinstall the adapter entirely. This process forces Windows to recognize the hardware again and apply a fresh driver setup. It's particularly useful if the current installation is corrupted or if the adapter keeps disappearing from Device Manager.
Open Device Manager.
Right-click your network adapter > Uninstall device.
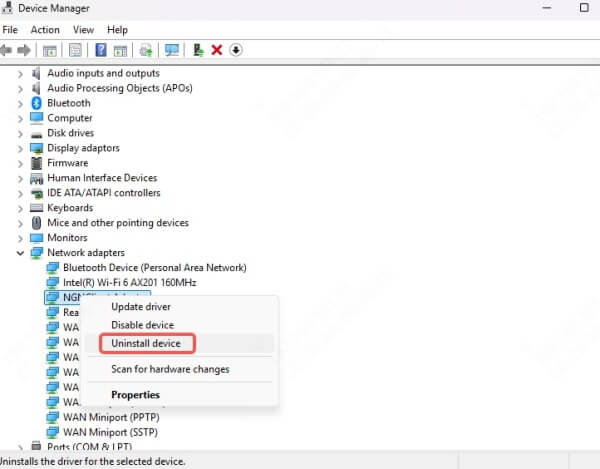
Restart your PC—Windows will reinstall it automatically.
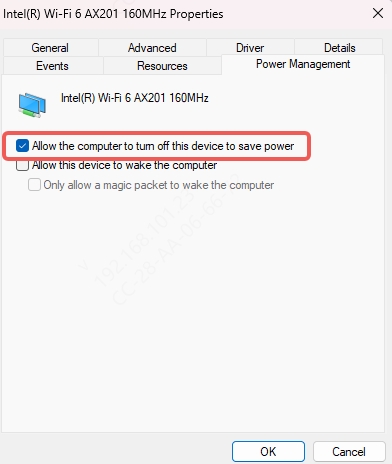
Method 4: Disable Power Management for Network Adapter
Windows has built-in power-saving features that sometimes do more harm than good. One such feature allows your PC to turn off the network adapter to save energy, which can lead to unexpected disconnections or complete network failure. Disabling this setting ensures your adapter stays active at all times, especially useful for desktops and always-on laptops.
Go to Device Manager > Right-click adapter > Properties.
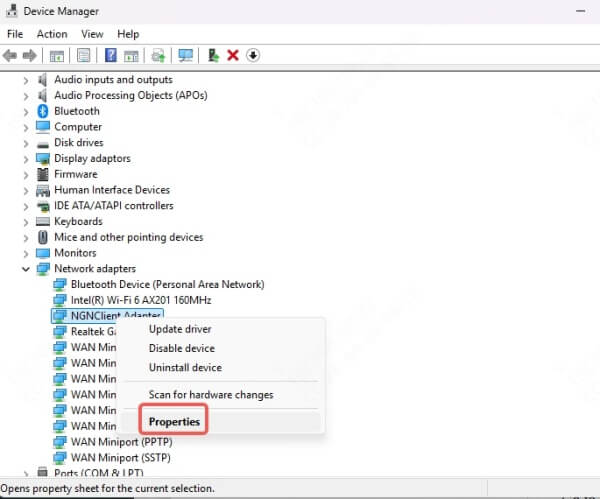
Go to Power Management tab.
Uncheck Allow the computer to turn off this device to save power.
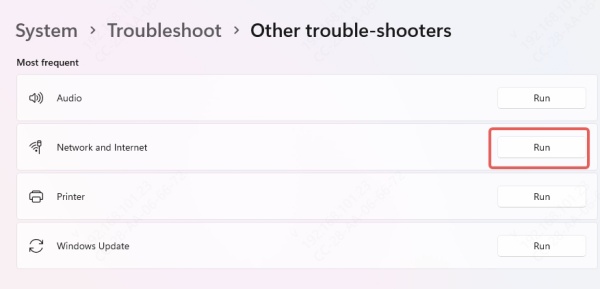
Method 5: Run the Network Troubleshooter
The Network Troubleshooter automatically scans for and attempts to fix a wide range of internet and adapter-related issues. It’s a great first step for users who want a hands-off diagnostic and repair solution.
Go to Settings > Update & Security > Troubleshoot > Additional troubleshooters.
Click Internet Connections > Run the troubleshooter.
Method 6: Check BIOS/UEFI Settings
Sometimes, the network adapter can be disabled at the firmware level, especially on laptops or custom-built PCs. If Windows doesn't detect your adapter at all, it’s worth diving into the BIOS or UEFI settings to ensure the network interface is enabled.
Reboot and enter BIOS/UEFI (usually F2, DEL, or ESC).
Look for Onboard LAN or Network Controller and ensure it’s Enabled.
Conclusion
Dealing with a network adapter that’s not working in Windows 10 can be a headache, but it’s usually fixable with the right steps. From updating drivers and resetting network settings to running troubleshooters or using Driver Talent X, the solutions are within reach.
